Construction Process
Permits
Applicable building codes are assessed for your area and permits obtained accordingly. During this time, you can help with the preparation by removing plants, moving lawn furniture, and moving any obstacles that would prevent access to the area. If there isn't a gate or open access to your yard, the fence will have to be removed. If we have contracted to remove your fence, we will remove only the portion necessary to gain access and complete the construction of your new pool.
Layout
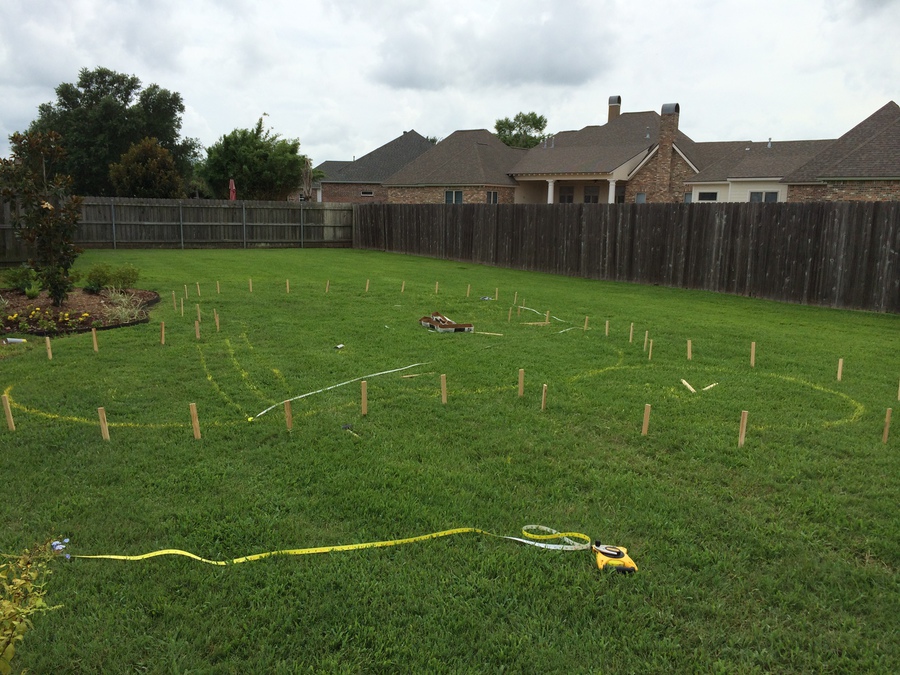
Spray paint is applied on the ground to mark the boundaries of your upcoming pool. This will show the shape and dimensions of your exact pool location in your yard. Look to see if you have any changes in terms of the pool or spa placement in relation to your backyard. This is your LAST chance to move the pool! Your approval of the layout will trigger us to begin excavation. After excavation has begun, any changes could cause additional costs.
Excavation
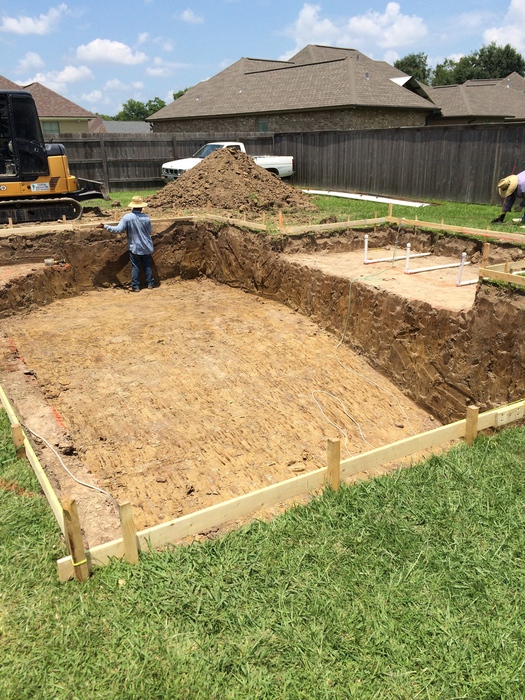
Within the spray painted lines, excavation begins by using a backhoe tractor or bobcat to cut a precise shape and curvature. The actual hole will be 6" to 12" larger than the finished dimensions of the pool. This is to allow forming material to be placed around the outer edge of the pool and/or spa. Also, the bond beam is 12" x 12" around the circumference of your pool. Excess soil is removed on the same day of excavation. If you want any soil left on site, be sure to arrange with us in advance. We will need to know where it should be dumped and how much. The entire pool is a LOT of dirt. Don't forget, sometimes the soil will expand once it's been excavated. If you have us leave too much, there will be an extra charge for us to return with the excavation equipment to pick it up.
Rebar
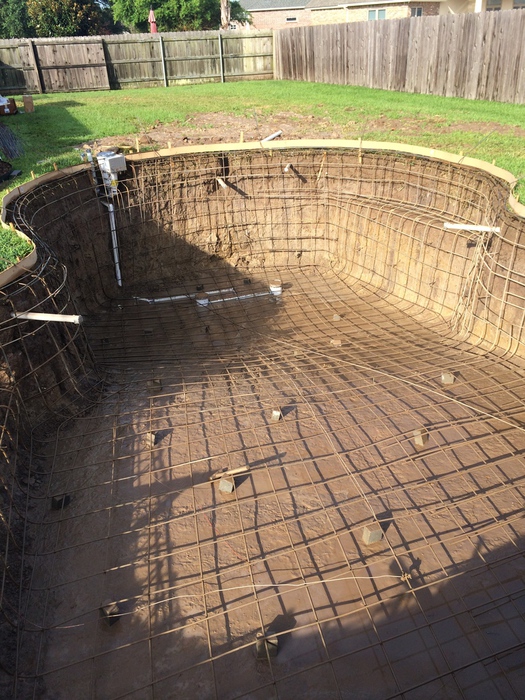
Rebar (3/8" diameter steel bar) is tied to form a mesh framework on the floor and walls of your pool. There will be rebar on the bottom of the pool, walls of the pool, around the skimmer, and into the bond beam. Spacers ensure the rebar is suspended above the ground and not against the dirt floor of the pool. This system allows gunite to be suspended between the bars and evenly distributed under, around, and above the rebar. Rebar is the strength of your pool when combined with the gunite. Small tie wires hold the bars in place temporarily until the gunite is applied.
Short Plumb
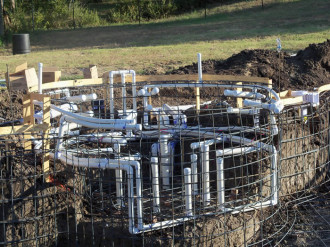
"Short Plumb" means that the major components of the plumbing and electrical parts are installed inside the wall and through the rebar. Non-corrosive schedule 40 PVC pipe/fittings will be used throughout your pool. Our plumber will place the pipes and set in place the latest state of the art equipment per your plans. Electric wiring will be installed from your electric panel to the equipment. Then, the installation extends from the equipment to all lighting fixtures and equipment in your pool. Your safety and protection is our number one concern. All electrical wiring, conduit, and grounding devices meet and/or exceed National Electric Code standards.
Gunite
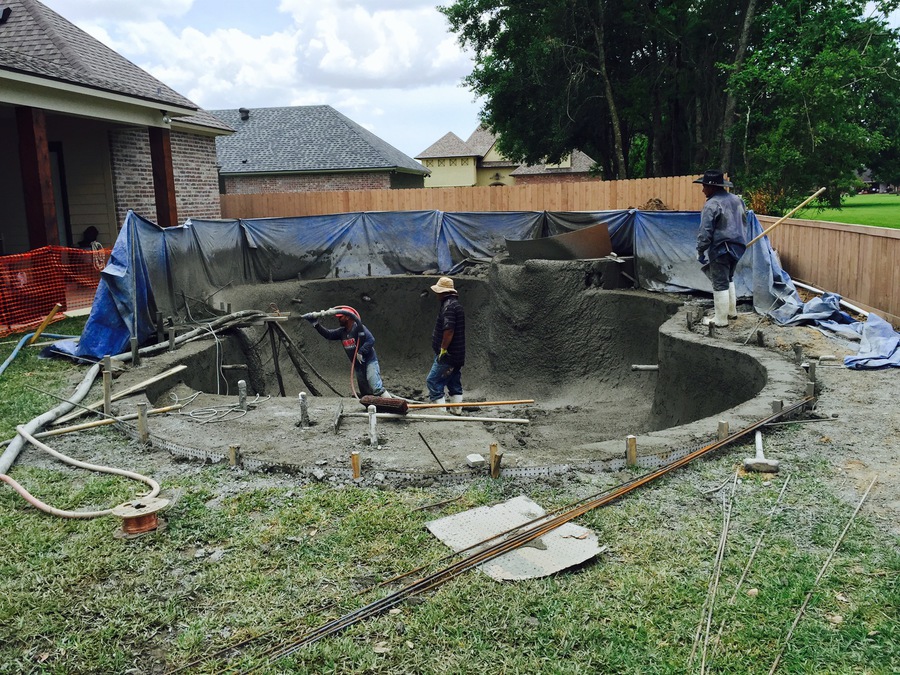
Gunite is pneumatically applied, which is a spraying process to create the pool shell. The pool shell implies the base flooring, wall areas, and bond beam of your pool. By strict specifications, gunite is applied to both sides of the rebar to suspend the bars within the walls and floor to form a solid structure. The strongest pool shell has 8"-12" walls and floor with 12" transitions. Water curing of the gunite is critical and the entire pool shell must be hosed or sprayed with water three times daily for a seven day duration. (Timing may vary depending on air temperature and humidity levels) This slows the gunite's curing process and is a preventative measure that will minimize shrinkage cracks due to premature curing.
Tile and Coping
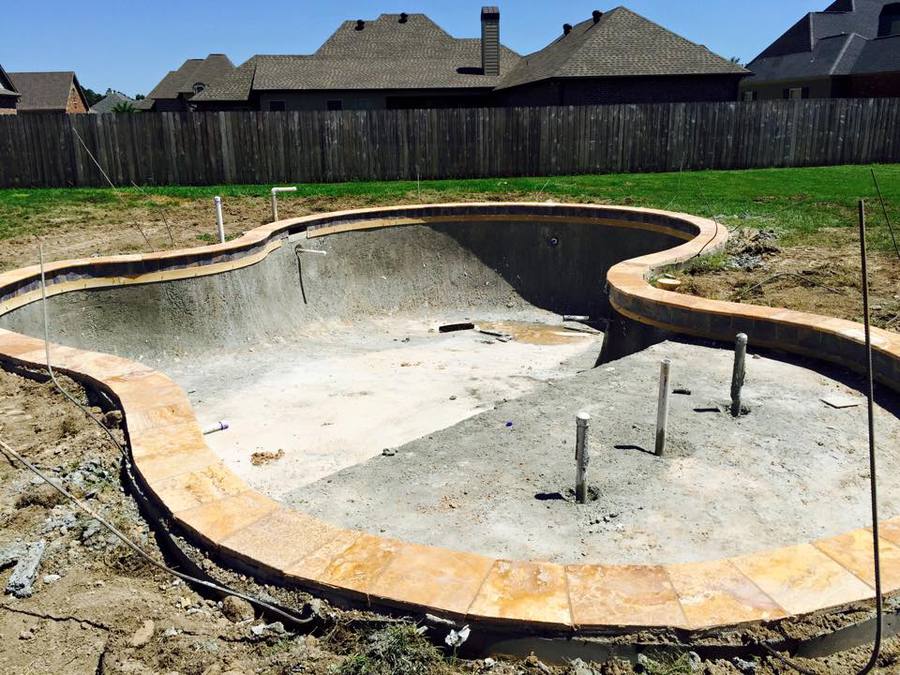
Tile is installed at this phase around the pool perimeter and other areas as indicated in your plans. The usual installation of 6"x6" tile will offer a smooth surface to clean. You will need to choose your tile early to ensure the manufacturer's availability and allow for extended shipping times. After construction begins, changes to the style or selection of tile may have additional costs, and no changes to the tile will be made after installation.
Rock work for waterfalls, retaining walls, and accent boulders around your pool will be installed at this time. The water works will be tested for operation and proper plumbing installation.
Several types of coping in various shapes and sizes can be used. We install mostly travertine coping, in various sizes and thickness. Before installation, your changes to the style or selection of coping material may have additional costs and no changes will be made after installation.
Deck
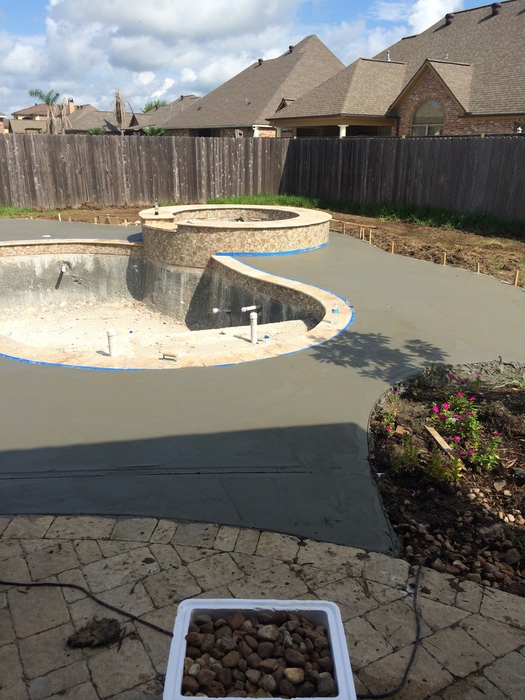
The finishing materials of your choice are applied to the deck area. Decking that surrounds your pool can be concrete, brick, stone, pavers, or many other materials. Concrete decking around the pool is 4" minimum thickness with 3/8" rebar reinforcement. Any deck shape chages, additional deck, or deletions should be made at the time prior to forming. Some changes may have additional costs and no changes to the deck will be made after the deck has been poured and/or installed.
Plaster

The pool surface is applied at this time. Plaster is pneumatically applied in two coats then hand troweled to a non-slip, waterproof surface. When the plaster is complete, we will immediately begin filling the pool and/or spa. You can help ahead of this task by having your garden hose available for the fill. You will need to fill your pool until the water level reaches the center of the tile or to the center of the skimmer. Your pool is then full and you may turn off the water. Do not turn the water off during the fill as this will cause a bathtub like ring to occur and stain your pool.
Clean-Up
Construction debris will be cleaned away from both the interior and the exterior of the swimming pool at this time. If we took down the exterior fence, we will put it back up. Municipalities and insurance companies require pool safety barriers to deter children from entering the pool. Another inspection from the municipal inspectors may be required at this phase of construction, in some areas. We will keep you informed of inspectors and their scheduled inspections. Self closing and self latching gates are also required, in most cities.
Start-Up

Your pool is now complete and ready for start-up! We will perform the start-up of your pool equipment for the first time. The equipment will need to remain operational for a full week to clear the water of any plaster dust or sediments. It will be necessary to brush the plaster 3 times a day for 7-10 days at this point. You'll want to schedule Pool School, where we will provide you with instructions on how to maintain your new pool. You will receive valuable "hands on" instructions, explanations, and demonstrations on the operations of your new pool. We will share with you the easy methods to clean the filter, empty baskets, and check your chemicals. Only a minimal amount of maintenance will keep your pool working efficiently and clean for many years to come.